This is a battle report or 30 Oct 2011. I played against my friend Ograloch and his Menoth army. He has beaten me the last few times, but I have been working on my Retribution lists during this time, so I was excited to see what my latest list could do. Here are the lists:
Protectorate of Menoth
35+6 points, 31 models
35+6 points, 31 models
The High Reclaimer +6 points
* Revenger 6 points
* Revenger 6 points
Avatar of Menoth 11 points
4 Choir of Menoth 2 points
5 Exemplar Bastions 8 points
6 Holy Zealots 4 points
10 Temple Flameguard 6 points
* TFG Officer & Standard 2 points
The Covenant of Menoth 2 points
4 Choir of Menoth 2 points
5 Exemplar Bastions 8 points
6 Holy Zealots 4 points
10 Temple Flameguard 6 points
* TFG Officer & Standard 2 points
The Covenant of Menoth 2 points
35+6 points, 29 models
Lord Arcanist Ossyan +6 points
* Hypnos 9 points
6 Dawnguard Invictors 6 points
* Invictor Officer & Standard 2 points
Eiryss, Angel of Retribution 3 points
Ghost Sniper 2 points
Lady Aiyana & Master Holt 4 points
10 Mage Hunter Strike Force 8 points
* Mage Hunter Commander 2 points
Stormfall Archers 5 points
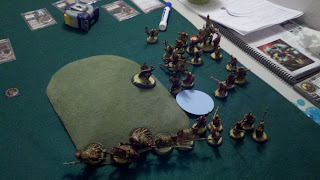
This was the first time I have seen the Reclaimer and I have to say I was impressed. Ograloch utilized him well throughout the battle. Lets get to the deployments. I won the roll and had him deploy first. I still think this was the right thing to do, but I was not ready to see his army fully stacked in one area. The nearby hill would turn out to be very important later on.
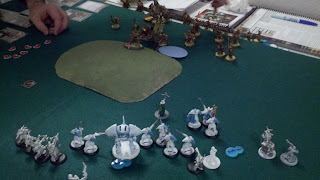
You can see my Retribution army deployed on the right. I used my Phoenix for Hypnos and Sentinels for the Invictors. After this battle I have definitely decided to buy the Invictor models. Below you can see my full deployment.
I placed the Stormfall Archers on the far left in order to put pressure on the side. I have the MHSF advanced deployed near the hill to take shots at his army as they approached. This was my first mistake. I should have help them back some. I did not fully understand the strategy used with this Menoth list at first, but it is a mistake I can learn from and not make in the future. The next picture shows his army after the his first turn.
You can see he kept is army very tight and covered with the clouds so I would have a difficult time getting in any shots. This of course would not affect the MHSF, but as you will see in the next picture, I did not figure out the range correctly and brought some of my MHSF too close.
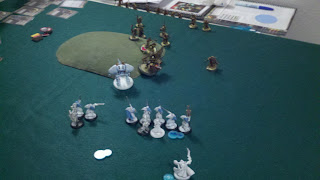
The above shot is at the end of my turn. As you can see, I did not really get anything done. I was able to take a 16" shot with some of the Stormfall Archers, but I did not remember to get Shatter Storm on them to help kill more troops. This was lesson #2 with using this list. I did not see all of the times I could have used Shatter Storm, and now will try and get it on any unit taking a shot at troopers. Ignore the wreck markers in the pictured until later. They were just placed on the table for no reason at this point.
The above shot is a close up to get an idea of the distance between the 2 forces. This is where I realized that I needed to keep the MHSF back more against this type of list. The other option would to have been to put Shatter Storm on the MHSF, move a couple of the up, and take shots on the lowest DEF/ARM troopers. This could have done some good damage to a large number of his models, at the cost of 2 or 3 MHSF. Plus having them up there would have slowed his force's advancement across the table.
As you can see in the above picture, his force went right after my forward MHSF. As I said early, this was a missed opportunity for me in getting the Shatter Storm shots right in the middle of his formation.
The above picture is a wider shot after my move on turn 2. I brought the Stormfall Archers around even more. This would start to get me shots at the Bastions, but my real thought was to shoot at the Flameguard on the far side. I would miss, but get the AOE to float over. I made the mistake of forgetting that since I could not draw a point base to base, I could not technically use them as a target. So this turn I took shots at the Bastions. I did not take any out due to their damage transfer, but it was a significant amount of damage between my Stormfall Archers with the added damage die, and the MHSF.
The above shot is just the perspective from the Stormfall Archers. You can see where I could not target the troops on the far side.
This is a similar shot from the perspective of my MHSF and Invitors.
Turn 3 move by my opponent is above. He was able to kill most of my MHSF on this turn. This really hurt since they were my best chance to kill is Jacks.
The above picture should give you an idea of the devastation to the MHSF. I was left with only the leader. Eiryss was also now in danger. This was a rough turn for my and I knew I would have to retreat some to be able to have a chance. The tide would turn some on the next turn.
The above photo is the end of my turn. I popped Ossy's feat and did as much damage as possible. I was able to take out the Bastions as well as a lot of his troops. Little did I know that it was about time for my to see why they call him The Reclaimer.
As you can see, he popped his feat and was able to bring back 6 models right in my face. This really hurt as I lost my last MHSF, Eiryss, and my Invictor UA.
The above photo shows the end of my next turn. I took some shots at his Revenger then charged in with Hypnos. This was effective enough to kill the Revenger. I knew I was in trouble with the Avatar right there, so I figured at this point Hypnos was just there to buy me time. Ograloch was very effective in placing his clouds as well. Although they are missing in most of the pictures, he blocked my view very well. Missing my MHSF really hurt at this point in the battle.
The above photos show his next turn as he ripped Hypnos a new one as well as killed off more of my Invictors. As you can see, this turned into a battle of attrition, and since he kept clouding my LOS, I could not do much with the Invictors.
The above photo shows the end of his next turn. The Avatar took out Hypnos, and he was able to block most of his units from my shooting. I did some damage with my last Stormfall Archer and the last of my Invictors.
The above photo shows that he had killed my Stormfall Archer and again protected himself from my shooting. I almost conceded at this point because it was getting late. All he had left was the Chior, Avatar, and The Reclaimer. I knew my only chance was to spread out and go for a caster kill in melee. On this turn, I just took some pot shots at his Jack and moved.
After we both went again, you can see all I had was Ossy and Lady Aiyana. With all of my focus, I knew I had only one chance and that was to put Quicken on Ossy, then move up and hit The Reclaimer.
The above is the final picture. I was able to do some damage to the Reclaimer, I think about 10, but it was not enough. At this point I conceded. It was a great game and a lot of fun.
Some final thoughts. I really needed to look at maximizing Shatter Storm with a single or two MHSF at different points in a game if the enemy troops are so close to each other. Although I did not go into a lot of detail, I felt I did play most of the units well. Taking out the Choir with well place Shatter Storm shots from the MHSF would have helped as well as taking out the Covenant earlier to help with making the Jacks stationary. I hope you enjoyed this report. Please feel free to post questions or comments on this blog or whatever source board brought you here. More battle reports to come in the future.


No comments:
Post a Comment