Showing posts with label WIP. Show all posts

Saturday, June 29, 2013

Feast of Blades Prep Blog

6/29/13

October 11th to the 13th is Feast of Blades.  Although filled with lots of gaming action, my focus will be on the Warmachine/Hordes tournament and gaming scene.  I am traveling to the site with two of my best friends and we are staying at the site.  This will be the first major tournament for me, and I am very excited.  I decided to write a continuing blog to document my preparation for the tournament.  This will include list preparation and decisions, painting efforts, and anything else I might want to write about before this happens.  I do want to thank my wife for giving my the opportunity to be gone for three days while she takes care of the kids.

Here is a link to the event: http://www.feastofblades.com/

I plan on participating in two of the Master's qualification tournaments.  They are the 42 pt, 2 list tournament and the 50pt, 2 list Divide and Conquer tournament.  More to come later this weekend, but thought I would get this started.

Spacejunky

Monday, February 20, 2012

Modeling: Gorax Complete

Well, it is great to be back from  a long break.  I have a  lot of blog posts to work on, so I thought I would throw this one out there since it has been a bane in my life recently.  This model is the Circle of Orboros Gorax model.  My first impression of this model is that is looks like a feral Donkey Kong.  I was seriously looking for a toy barrel to in his hands.  I did not get any pre-painting pictures of this model so I will just use the post-painting pictures throughout this blog.  


The model arrived pretty clean, without taking much cleanup of model.  The first thing you might notice is that the model is leaning way forward.  Now while this might seem like a great design based on the Gorax's story line and abilities, it made it a pain to put together.  The rock, rope, and main model are three separate pieces and they do not line up very well.  It took multiple attempts to get everything to work together.  While I am happy that I got it all together, that was when I noticed the model was very top heavy.  This causes the model to fall forward quite often, which makes playing with the model difficult.  I plan on gluing some metal pieces under the back of the base to help make it stay upright better.


I am not particularly happy with my painting of this model.  I believe that this model will finally push me to start into the adventure of air brushing my models.  I have found that my mixing of colors did not really give me the coloring affects that I was looking for. One of the changes I made to my coloring scheme was the graying of the hair bundles.  I had been using a darker brown (brown/black mix) and wanted to try something different.  Although I am not sold on the look yet, I think it is closer to what I am looking for in the warbeast's look.


At the time I took these pictures there were some painting issues that I have since fixed.  I got some of the white used to grey there hair on the base and the model's leg.  This helped me work on my technique so that I could make sure it did not happen again.  I did a lot of paint mixing on this model to achieve slight differences in the colors used on the body.  Although it did not have the affect I wanted, I see the benefits of expanding my paint collection and changing some of my techniques.  It is not showcase ready, but I am happy with it for now for table top.  With the amount of models I still have to paint, this one will have to sit for a while and wait for clean up.

  
 So I am on the the next model, which should be Megalith.  I am really looking forward to working on that model since it has some nice designs.  I am also going to start working on video blogs and model reviews to help fill the void now that I am re motivated to get this blog going.  I make no claims that I am professional at painting these models.  I believe that my technique and creativity have been increasing as I go and hope one day to be able to really produce high quality models.  More to come....


Sunday, November 13, 2011

Modeling: Lord Arcanist Ossyan Complete

Next up is my latest caster for my lists, Ossyan.  I will just call him Ossy for the rest of this painting report.  I purchased him right after release but just recently started playing him regularly having come back to Retribution after playing Circle for a little while.  

If I remember correctly, he came in 5 pieces including the base.  The most memorable part of putting him together was the tube running from his back to the cannon on this left arm.  It took a lot of tweaking to get the tube to fit in the correct spots.  Otherwise this model was very clean and too only a little work to get ready.  This was another model in my set that I had issues with the P3 White Basecoat.  The initial photos below still show some areas where I had problems removing the excess material.  Most noticeable is the face which did not come out clean.  The following 3 photos show the model after clean-up.


Next up was a reapplication of the base coat.  As I found during the last few models, the base coat when on very nicely this time.  There was no clumping or coverage issues.  Although I could tell there was some detail lost due to the previous base coat issues, I was happy with the overall look of the model.


Now it was time for inking.  This was where the detail really came out.  You can see in the blow pictures that the ink worked as intended, filling in the cracks with the dark blue.  I have stated in previous posts that although the Privateer Press painting has the armor solid white with the color "glow", I enjoy the look that comes out of my models where the entire armor has the blue glow coming out.  I am very happy with the ink and just wish I could go back on some of my already completed models, but I just do not have that kind of energy or time.  The inked pictures follow.


I did not get any pictures that show just the dry brushed white, but the following pictures show the completed model.  I also have two sets of photos.  One uses the flash and one does not.  I think I am liking the ones without the flash as the paper and white of the model show more correctly than the ones with the flash.  The flash gives the background a off-white or yellow tinge that I am starting not to like.

So back to the painting itself, I used a green on the cloak and gold/silver for different accents on the model.  As you can tell from the pictures, I need to work on the face detail, but I currently lack a brush that would allow me to put any detail into that part of the model.  I really like how the model turned out other than the face.  I like how intricate the model was created by Privateer Press, and I think this is probably my favorite looking Ret caster.


I am enjoying the painting scheme I have been using and will be using it on all future Ret models.  I am getting ready to make a large order which will include my third heavy and Invictors.  These will likely be my last Ret purchases until the new models come out.  But I still have lots of models to paint, so stand by for more.  Most of the purchase will be Circle models, so I am excited to have more of those to work on.  Until next time...

Wednesday, November 9, 2011

Modeling: House Shyeel Artificer Complete

Welcome to another painting posting for my Retribution army.  I had taken a break from painting due to work issues, but I am now able to put some time into my models.

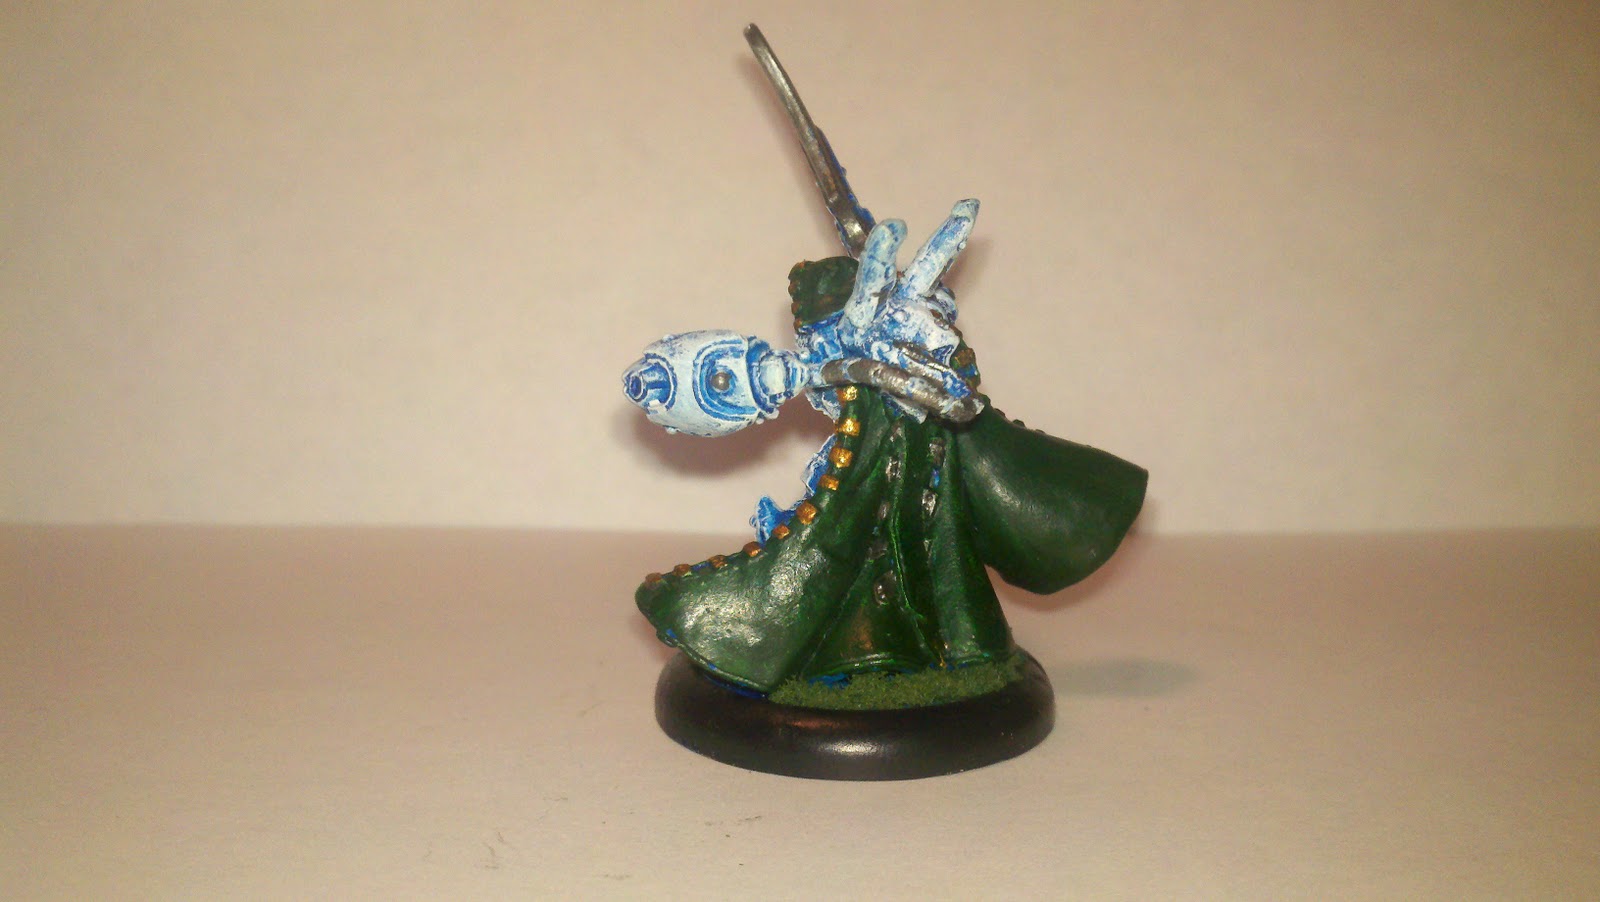
The next model I wanted to complete was the House Shyeel Artificer.  I have really liked the look of this model as soon as I saw the pictures.  This was another model which got base coated with the P3 White that clumped up.  So after taking my Dremel Brass Brush to the model, I was able to get it cleaned up enough to start over.


As you can see in both the front and side views, there was still some of the original base coat left on the model, but I was able to get a majority of it off.  I did have to go out and buy a new brass brush.  The one thing about the Dremel brass brushes is that the bristles will come out.  It is very important to wear glasses or goggles with when using it or you may take one in the eye.


The next two pictures show the second base coat.  This time the paint went on a lot more evenly and there was no clumping.  I was very happy with the coverage as I tried to hit all of the angles I could.  I love this model because of the look that he is flying.  I was not sure how it would look when I got done painting it, but it seemed like it would be a fun model to put paint.


The next step was to put on the ink to get the blue into the edges and groves.  This is the second model that I have done this with, and since I really liked how Kaelyssa turned out, I tried the same methodology with this model.  The following two pictures show the model with the blue ink.  Although it looks like a mess, it was pretty effective.  There are some very nicely done designs on the armes, and they really showed with the ink applied.


The next shot shows the model after dry-brushing the white on the model.  As with the Kaelyssa model, I was not very happy after completing this step.  But I gave it over night and ended up really happy with the dry brushing.  The Privateer Press paint jobs are always a solid white with the glow effect.  It was one of the main things that drew me toward this army.  In realizing my painting skills are not there by any means, I really like my version of it.


The next shots show the model with the accents painted and the exposed cloak.  That's right, it is not a skirt!!!  So I used the standard Dark Angels Green that I have been using for the cloaks on the other models I have painted.  I then used some Shining Gold for the cloak accents.  The part of the boots that is exposed got just a touch of silver.


Next up, it was time for basing.  I used the standard blue painters tape to cover the base slot holes.  It took a few pieces, but I got it covered nicely.  Not much to this.  Next up I made a decision I might regret.


In the photos below, you can see I used black around the edge of the base and used some green on the base.  I thought that this would help hide imperfections in the basing material.  I did not think that this paint would cause a problem with the basing material not sticking.  The base coat paint seems to provide a much better bond for the basing material, so this will likely be the last time I pre-paint the base like this.


Next up, you can see the model with the basing material applied.  I had to re-glue some of it down due to it not sticking well to the coat of paint I put down.  I still like the way it looks though.  The green matched enough on the part of the model attached to the base to still give it the "floating" look.  I will still have to touch up the model later, especially some of the accents, but overall I like the way it looks.


This was a fun model to put together and paint.  I am very happy with how it turned out.  I hope you like it.  Not sure which model I am going to work on next.  I think it is Ossy's turn to get cleaned up and ready for the table.  I will try to get a WIP for him out sometime before the weekend.

Wednesday, October 26, 2011

Modeling: Kaelyssa Complete

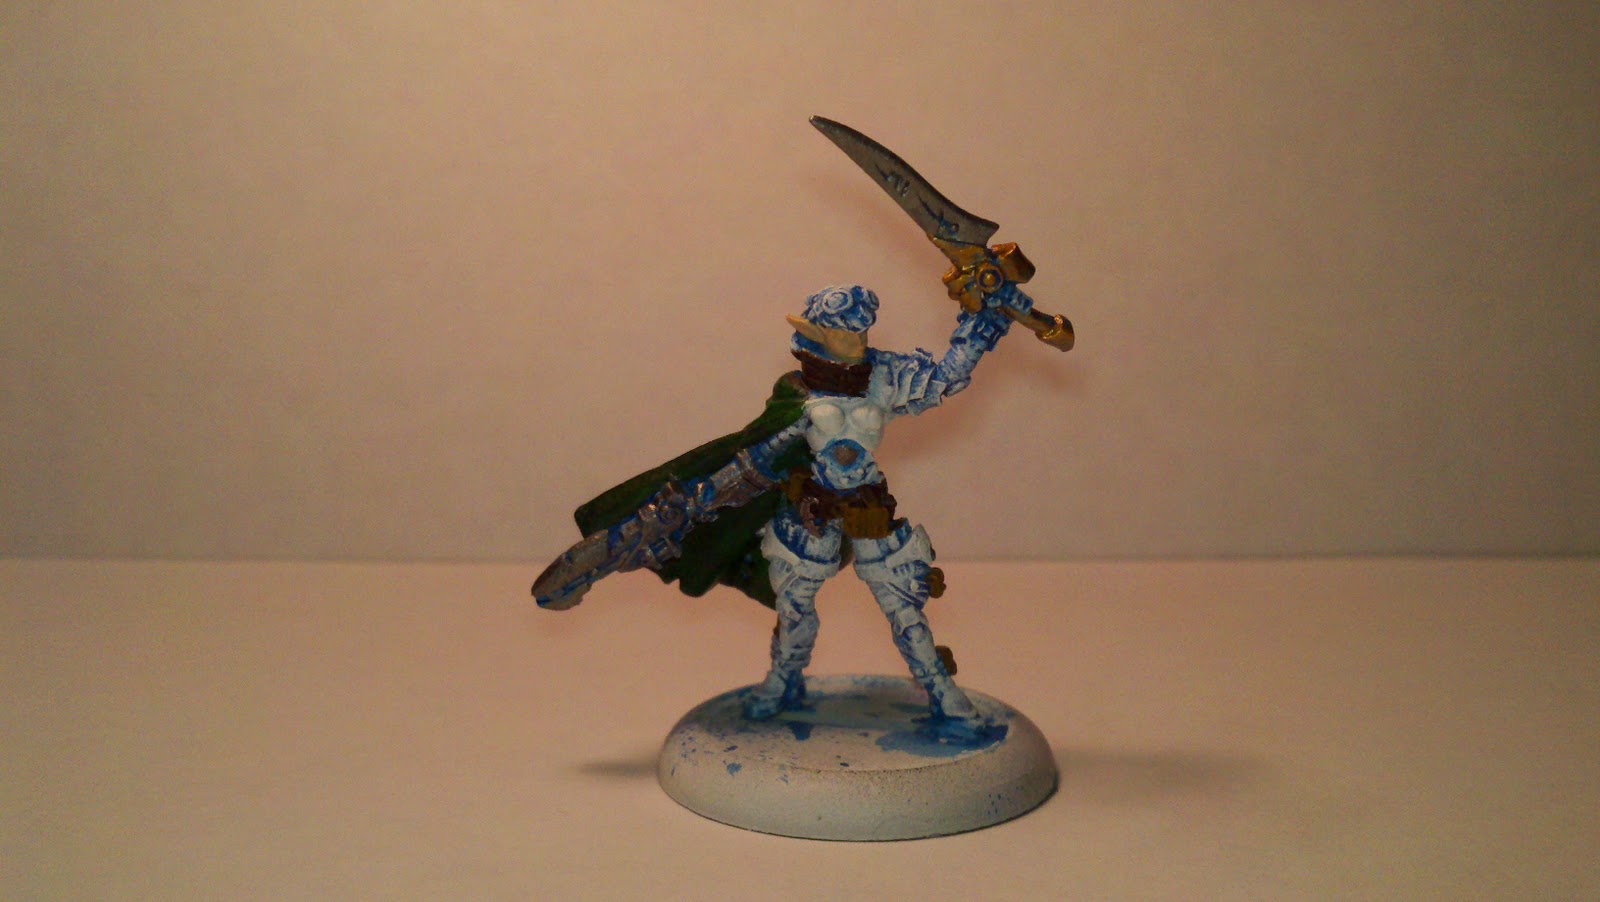
This has been the first time where I have really focused to get a model done in a short period of time.  As you saw in my previous post http://spacejunky74.blogspot.com/2011/10/modeling-rayvn-wip-1.html I had put on the base coat and the initial wash.  The next step was to dry brush white over the washed blue.  Although I like the look that the Privateer Press uses for the army, mine have turned into a more "glowing" look, and I am really enjoying it.  Here is a  of pictures with the dry brushed white complete.


Next up was to color the non-armor items.  I used Boltgun Metal on the rifle and the sword.  I was able to keep some of the blue undertone while painting these and I think they turned out really well.  I also used a green on the cloak, but was able to keep blue in the divots which gives it a really nice look.  I also painted the breast plate a little more solid white in order to solidify the look.  Now looking back at it, I wish I would have left it alone.  The night in which I completed the dry brushing, I was really not happy about the look and thought I would hate the model.  But the next morning, I looked at it again and the look really grew on me.  I am very happy with the model now.


The next step was to complete the base.  I also noticed that I had not painted the goggles.  So I painted them before working on the base.  I also forgot to paint around the base which I regreted later.  It turned out looking good, but a lesson for me in writing down the correct order to make sure I do not miss steps.  For the base, the first step was to put tape on the base to cover the open parts of the slot.  


After this I put down a layer of Elmer's glue.  I use a toothpick to spread out the glue.  I know some people use a 50/50 of Elmer's and water.  I tried that on one of my models and did not like how well the material stuck to the base.  So I am sticking to 100% Elmer's.  


After the glue has been well spread, I start to pile on the material in a Tupperware tray.  I press down over the entire base to ensure that I have it well covered.  I also use the toothpick to press down the material especially between the legs to make sure it is covered well.  Once the material is on, I use the toothpick to get the excess out off of the base.  I then stick the model in a small paper bag and spray it with a compressed air can.  This gets all of the loose material off of the base.  


Once I was happy with the material, I painted the base.  I will eventually paint the front arc onto the base, but I have not used a reliable method for getting this in the correct spot.  I am going to try something new once I have some more models ready for it.  Here is the finished model.


I am very happy how the model turned out.  To have it finished working only a little bit on it in the evenings each night over a three night period is very exciting for me.  Putting together this blog has helped me greatly in motivating me to complete other models I have.  The smaller models are a challenge, but can be fun.  My next model to paint is the Artificer and should be a challenge.  I can't wait.

Monday, October 24, 2011

Modeling: Warpwolf Stalker Complete

So I decided to do a post today on a model I have already completed, and I feel is my best work so far.  The Circle of Orboros Warpwolf Stalker.  This model was slightly difficult to put together.  I have never pinned models before, but I can see how useful that technique could be.  I started the model off with a black base coat.  The first thing I learned was that brown on black becomes purple.  So the brown skin on the model is a lot of layers of paint to get the color correct.


What I have not really tried out is a method for getting the muscular look in the legs.  I have read what is in the force book on it and just decided not to go with that technique on this model.  I still think the muscles look decent event without the texture.


From the above view, you can start to see some of the detail in the hair.  I just brushed the brown over the black base coat, trying to leave the black in the crevices.  This seamed to work really well and I think is the most technically painted area I did that looks good.  You can also see the gold areas of the mask and feet with the green areas.  This took a little work to get right, but I found a way that limited the amount of touch up needed on the model.

 
Here you can see some more detail on the feet and especially on the armored arm.  You also get a good look at the back side of the basing material.  For this I used Elmer's and Dark Green heavy turf.  Although the turn is a little thicker than I expected, I still like the way it looks on my models.  I am also using rocks from a hobby store on each of the bases I am completing to add to the look.


The last picture got a little light saturation, but you can see more of the back hair and back musculature.  This model was pretty fun to paint and I can tell that I am going to enjoy painting all of the Circle warbeasts.  The hardest part was getting to some of the more "isolated" location on the model because I put it on the base before painting.  This is something I will have to look at during future painting attempts.  I hope you enjoy this paint job.  As always, any thoughts are welcome.