Showing posts with label Kaelyssa. Show all posts

Wednesday, October 26, 2011

Modeling: Kaelyssa Complete

This has been the first time where I have really focused to get a model done in a short period of time.  As you saw in my previous post http://spacejunky74.blogspot.com/2011/10/modeling-rayvn-wip-1.html I had put on the base coat and the initial wash.  The next step was to dry brush white over the washed blue.  Although I like the look that the Privateer Press uses for the army, mine have turned into a more "glowing" look, and I am really enjoying it.  Here is a  of pictures with the dry brushed white complete.


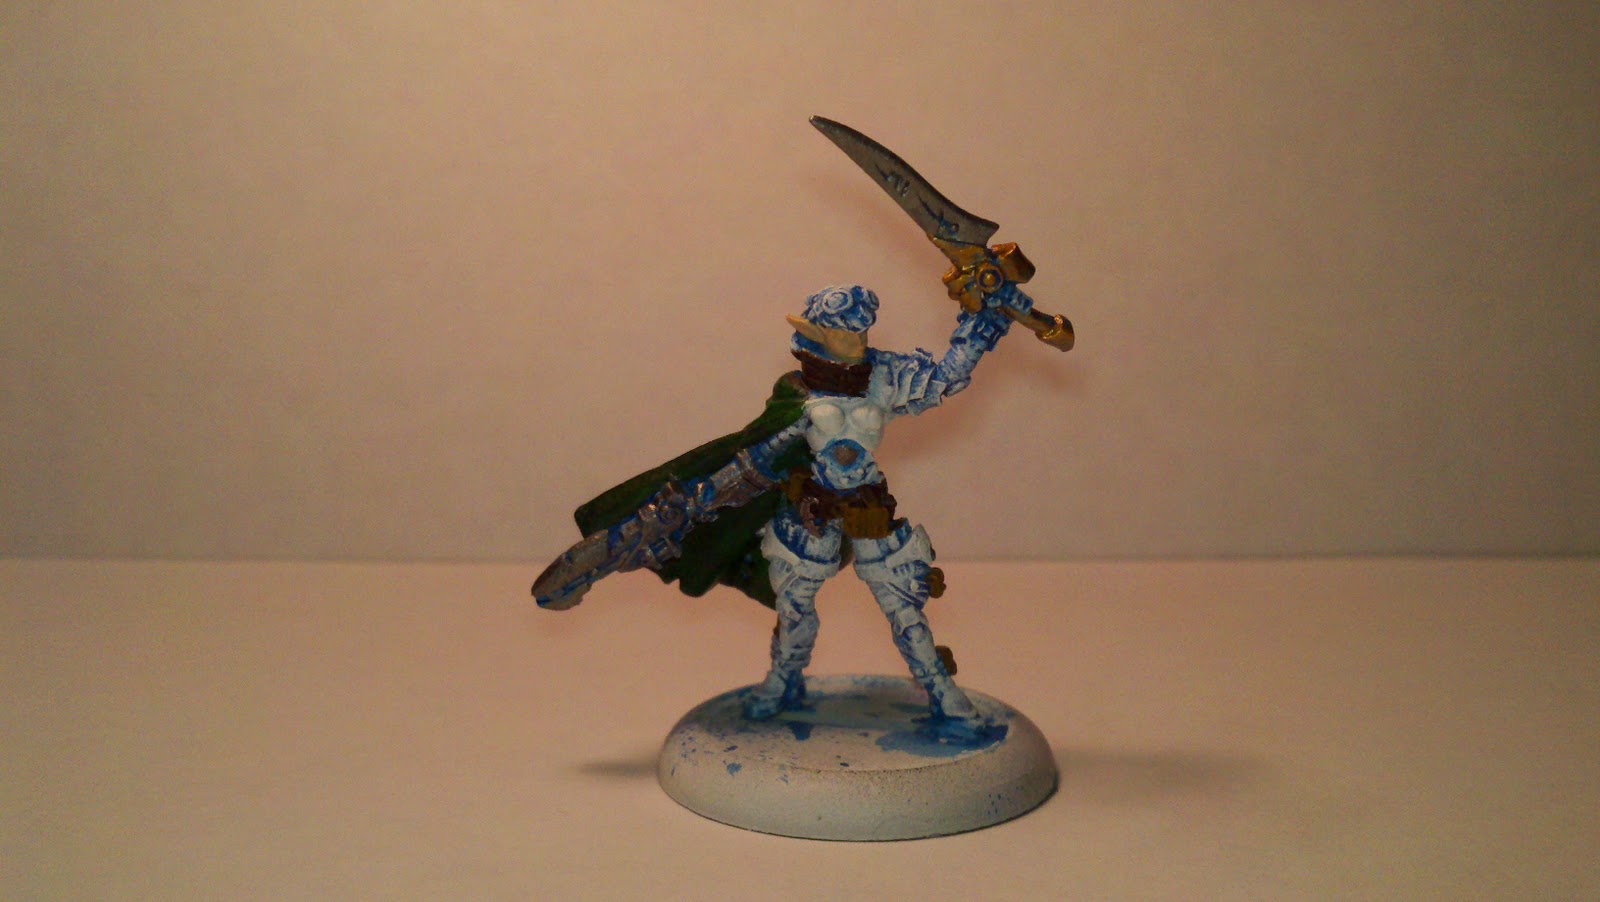
Next up was to color the non-armor items.  I used Boltgun Metal on the rifle and the sword.  I was able to keep some of the blue undertone while painting these and I think they turned out really well.  I also used a green on the cloak, but was able to keep blue in the divots which gives it a really nice look.  I also painted the breast plate a little more solid white in order to solidify the look.  Now looking back at it, I wish I would have left it alone.  The night in which I completed the dry brushing, I was really not happy about the look and thought I would hate the model.  But the next morning, I looked at it again and the look really grew on me.  I am very happy with the model now.


The next step was to complete the base.  I also noticed that I had not painted the goggles.  So I painted them before working on the base.  I also forgot to paint around the base which I regreted later.  It turned out looking good, but a lesson for me in writing down the correct order to make sure I do not miss steps.  For the base, the first step was to put tape on the base to cover the open parts of the slot.  


After this I put down a layer of Elmer's glue.  I use a toothpick to spread out the glue.  I know some people use a 50/50 of Elmer's and water.  I tried that on one of my models and did not like how well the material stuck to the base.  So I am sticking to 100% Elmer's.  


After the glue has been well spread, I start to pile on the material in a Tupperware tray.  I press down over the entire base to ensure that I have it well covered.  I also use the toothpick to press down the material especially between the legs to make sure it is covered well.  Once the material is on, I use the toothpick to get the excess out off of the base.  I then stick the model in a small paper bag and spray it with a compressed air can.  This gets all of the loose material off of the base.  


Once I was happy with the material, I painted the base.  I will eventually paint the front arc onto the base, but I have not used a reliable method for getting this in the correct spot.  I am going to try something new once I have some more models ready for it.  Here is the finished model.


I am very happy how the model turned out.  To have it finished working only a little bit on it in the evenings each night over a three night period is very exciting for me.  Putting together this blog has helped me greatly in motivating me to complete other models I have.  The smaller models are a challenge, but can be fun.  My next model to paint is the Artificer and should be a challenge.  I can't wait.

Sunday, October 23, 2011

Modeling: Kaelyssa WIP (1)

Here is my first painting post.  This will be for Kaelyssa.  A little background on this painting job first.  I tried to use the P3 base coat spray paint for the first time on a set of 7 models, including Kaelyssa.  Either due to it being a new bottle, the temperature outside, or because I stutter sprayed instead of just straight spraying, the model had a think rough coat instead of a smooth base coat.  This required me to take my Dremel with the brass brush so I could remove the original coat.


I did have some problems getting all of the paint off, but I did what I could with the Dremel.  So now came time for base coat #2.  This time I took only 2 models (Kaelyssa and the Artificer) and base coated them properly.  I will show the work on the Artificer in a separate posting.  This time the base coat went on pretty decently.
With a good white base coat, I decided to try a new method for putting on the standard Retribution blue lines.  I have tried before to just get the seams soaked in blue, then just cleaning up as needed.  I found that this was very tedious.  This time I am going to just do a coat in the blue wash, and attempt to dry brush the needed white on top.  You will get to see how well this goes on the blog.  Here is what is looks like with the blue wash.

Next up is the white dry brush and some detail work.  See you in part 2.