This is a battle report or 3 Nov 2011. I played against my friend Guillius (http://guillius.blogspot.com/) and his Khador army. He has beaten me the last few times, but I have been working on my Retribution lists during this time, so I was excited to see what my latest list could do. Here are the lists:
Khador
Vladimir Tzepesci, the Dark Champion (*5pts)
* Beast-09 (11pts)
Doom Reavers (Leader and 5 Grunts) (6pts)
* Greylord Escort (2pts)
Iron Fang Pikemen (Leader and 5 Grunts) (5pts)
* Iron Fang Pikemen Officer & Standard (2pts)
Kayazy Assassins (Leader and 5 Grunts) (5pts)
* Kayazy Assassin Underboss (2pts)
Eiryss, Angel of Retribution (3pts)
Manhunter (2pts)
Manhunter (2pts)
Retribution of Scyrah
Lord Arcanist Ossyan +6 points
* Hypnos 9 points
6 Dawnguard Invictors 6 points
* Invictor Officer & Standard 2 points
Eiryss, Angel of Retribution 3 points
Ghost Sniper 2 points
Lady Aiyana & Master Holt 4 points
10 Mage Hunter Strike Force 8 points
* Mage Hunter Commander 2 points
Stormfall Archers 5 points
The scenario for this match was Diversion.
The first picture was my deployment. As I get more comfortable with this list, I am seeing new ways to use the units together. This is my second battle with this list. The main change I am looking at is replacing Hypnos. I have a battle report to type up from the next day in which I traded out Hypnos for the Daemon. I will express my opinion on that in the next battle report. As you see in the picture below, I put my MHSF up front, with the Invictors on the right and Stormfall Archers on the left.

Below is the Khador deployment. Having faced this list before, I knew I was in for a tough time. Literally, with Tough, I really hate Khador. There were also very few troops to target for Shatter Storm, so I knew I would not get much use out of it.

The following picture gives you the overall board view. You can see the two armies along with the control zones. This was the first scenario I had ever played beside caster kill and kill box, so I was excited to try something new.

In the following picture, you can see that went first. I spread out my army some, trying to cover the left, right, and middle with ranged attacks. I have moved the MHSF straight up and started taking shots at the Doom Reavers. I was able to take out a few of them, but not nearly as many as I had hoped. My shooting really was not effective this game, but I rolled about average. I kept Ossy back but learned that I would need Admonition on him instead of Chronomancer very soon.

The following picture shows the end of turn 1. You can see that he was able to get a bunch of troops in and took out much of my MHSF. I believe I only had 2 that were not engaged. I underestimated his move ability. This was not turning out to be very positive for me. He did attempt to take out Eiryss with two seperate models, and rolled 2,1 each time. I got lucky she survived but I did not have a viable way to get her out of contact.

Next up is the end of my next turn. You can see that I moved my Invictors to help cover Ossy and did what I could with the my models. I took out a Doom Reaver and a Manhunter with my Stormfall Archers, and did some damage with my Invictors, but my turn was overall ineffective.

The next picture is just a different angle of the carnage.

The next picture shows Guillius's turn. He was able to get one of his Pikemen up to Ossy with a combination of spells and moves. Although he could not attack this turn, Ossy was engaged and I would be left with very few options. This is where I started to consider leaving Admonition on Ossy all of the time. I have to be able to protect him better from rushes like this or Admonition him so he can move out of the way. I knew I only had two options. Take out his caster or protect Ossy with all available units. Since his trooper had the "+3 to all buff" on him, it was unlikely I could kill him with the models I had left. I probably should have tried to get Hypnos and at least get some attacks on him, but I focused on trying to take out the caster.

In this next photo, you can see I moved the Invictors up and did a CRA with everyone I could on his caster. I did a decent amount of damage, I believe around 10 pts, but all it ended up doing was making his caster 17 armor I believe which made him impossible for me to damage with my left over units. I should have brought Hypnos back to Ossy to attack, but for some reason did not, and instead attempted to take out some of the units between my shooters and the caster. I believe the problem was that I did not put any focus on Hypnos, and so with his move, he could not engage and hit the Pikeman. The Pikeman did 10 dmg to Ossy on the charge.

The next picture just shows the angle I was able to get on his caster, but I already knew it was unlikely for me to survive.

This last picture shows when Ossy died. He was hit with the initial attack of the Pikeman. He was able to use the Focus on his caster to allow the Pikeman boosted attack and boosted damage, killing Ossy. It was a rough end for me, but I learned from it which is great for me, even in a loss.

Final Thoughts: I am really liking this list. Since I have now played it against Khador and Menoth, I have seen different ways to use the units. I was very disappointed in Hypnos though, and either need to learn better how to use him against my meta, or switch him out. It was still a fun game and I would like to thank Guillius for his great sportsmanship. More reports coming soon. Good bye...
* Hypnos 9 points
6 Dawnguard Invictors 6 points
* Invictor Officer & Standard 2 points
Eiryss, Angel of Retribution 3 points
Ghost Sniper 2 points
Lady Aiyana & Master Holt 4 points
10 Mage Hunter Strike Force 8 points
* Mage Hunter Commander 2 points
Stormfall Archers 5 points
The scenario for this match was Diversion.
The first picture was my deployment. As I get more comfortable with this list, I am seeing new ways to use the units together. This is my second battle with this list. The main change I am looking at is replacing Hypnos. I have a battle report to type up from the next day in which I traded out Hypnos for the Daemon. I will express my opinion on that in the next battle report. As you see in the picture below, I put my MHSF up front, with the Invictors on the right and Stormfall Archers on the left.

Below is the Khador deployment. Having faced this list before, I knew I was in for a tough time. Literally, with Tough, I really hate Khador. There were also very few troops to target for Shatter Storm, so I knew I would not get much use out of it.

The following picture gives you the overall board view. You can see the two armies along with the control zones. This was the first scenario I had ever played beside caster kill and kill box, so I was excited to try something new.

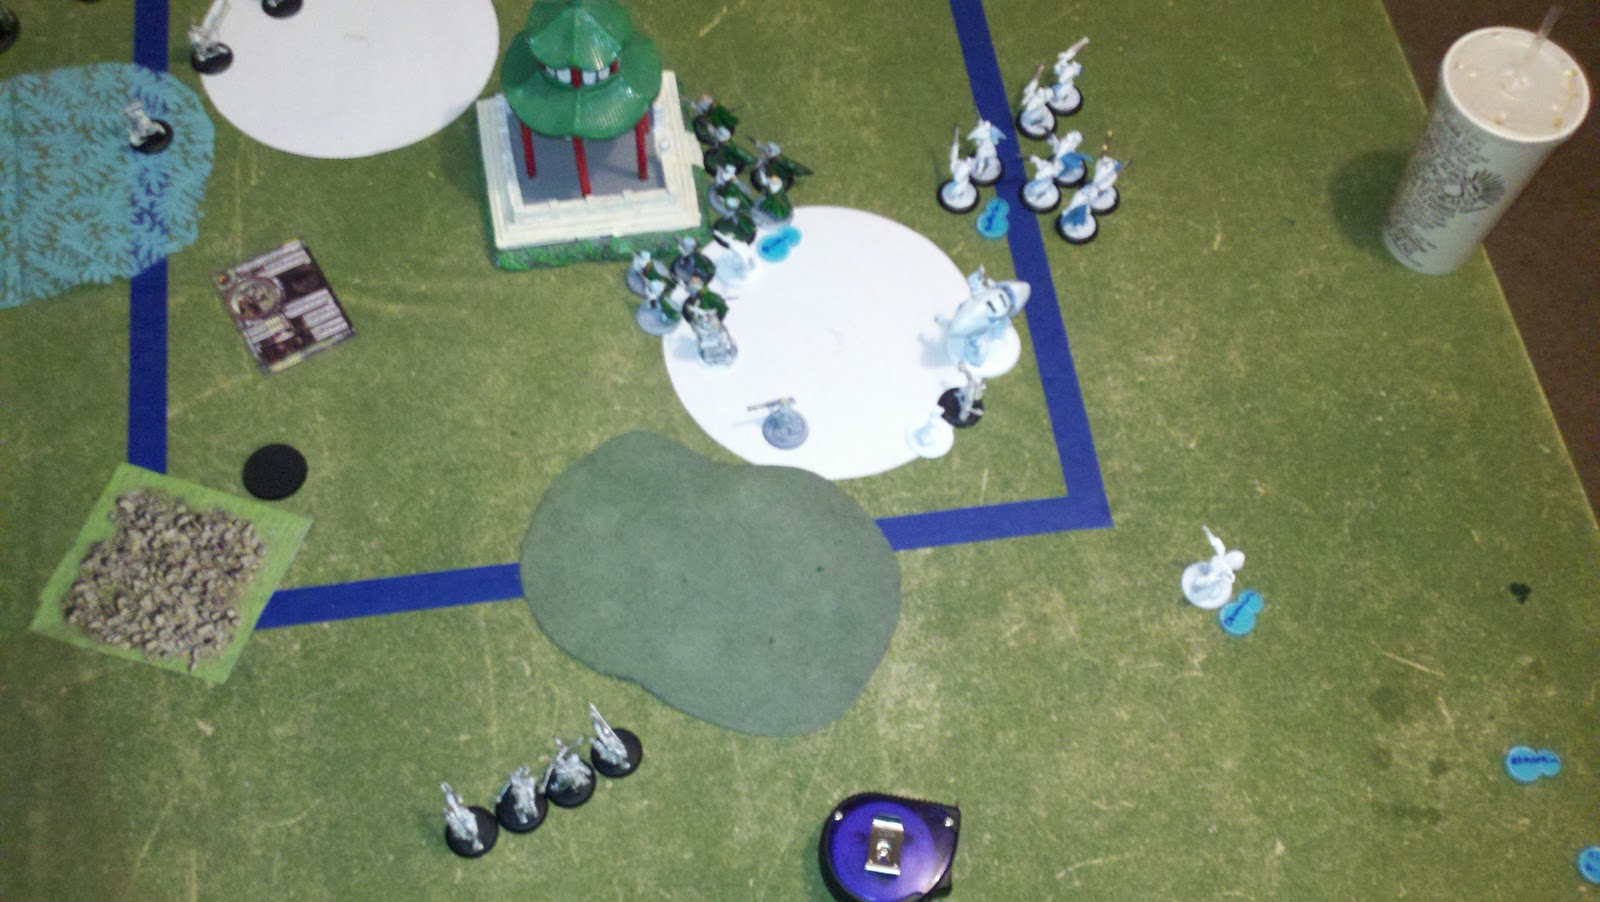

Next up is the end of my next turn. You can see that I moved my Invictors to help cover Ossy and did what I could with the my models. I took out a Doom Reaver and a Manhunter with my Stormfall Archers, and did some damage with my Invictors, but my turn was overall ineffective.

The next picture is just a different angle of the carnage.

The next picture shows Guillius's turn. He was able to get one of his Pikemen up to Ossy with a combination of spells and moves. Although he could not attack this turn, Ossy was engaged and I would be left with very few options. This is where I started to consider leaving Admonition on Ossy all of the time. I have to be able to protect him better from rushes like this or Admonition him so he can move out of the way. I knew I only had two options. Take out his caster or protect Ossy with all available units. Since his trooper had the "+3 to all buff" on him, it was unlikely I could kill him with the models I had left. I probably should have tried to get Hypnos and at least get some attacks on him, but I focused on trying to take out the caster.

In this next photo, you can see I moved the Invictors up and did a CRA with everyone I could on his caster. I did a decent amount of damage, I believe around 10 pts, but all it ended up doing was making his caster 17 armor I believe which made him impossible for me to damage with my left over units. I should have brought Hypnos back to Ossy to attack, but for some reason did not, and instead attempted to take out some of the units between my shooters and the caster. I believe the problem was that I did not put any focus on Hypnos, and so with his move, he could not engage and hit the Pikeman. The Pikeman did 10 dmg to Ossy on the charge.


This last picture shows when Ossy died. He was hit with the initial attack of the Pikeman. He was able to use the Focus on his caster to allow the Pikeman boosted attack and boosted damage, killing Ossy. It was a rough end for me, but I learned from it which is great for me, even in a loss.

Final Thoughts: I am really liking this list. Since I have now played it against Khador and Menoth, I have seen different ways to use the units. I was very disappointed in Hypnos though, and either need to learn better how to use him against my meta, or switch him out. It was still a fun game and I would like to thank Guillius for his great sportsmanship. More reports coming soon. Good bye...


